How to Create a WordPress Blog With the Free Site Editor
Creating a professional blog with WordPress no longer means installing a heavy page builder, buying a complex theme, or fighting with dozens of settings before you can publish your first article.
Today, the native WordPress Site Editor is powerful enough to help you build a clean, fast, modern blog website using only WordPress, blocks, templates, global styles, and a little bit of creativity.
In this WordPress blog tutorial, we’ll go step by step through the full process of creating a blog with WordPress from scratch. You’ll learn how to set up hosting, install WordPress, configure the first settings, design your homepage, create your first blog post, customize the single post template, build a blog archive, organize posts with categories, and prepare your blog for SEO.
The best part? Everything is built with the free WordPress Site Editor and the native WordPress Block Editor.
Why Build a Blog With the WordPress Site Editor?
If you are just getting started with blogging, simplicity matters.
You don’t want to spend the first week installing tools, fixing compatibility issues, or learning a completely separate design system before you can publish your first post. The WordPress Site Editor gives you a more direct way to build your blog because it lets you customize the structure of your website directly inside WordPress.
You can edit your header, footer, homepage, blog archive, single post template, and category pages visually. You can move elements around, change colors, adjust spacing, update typography, and create reusable layouts without touching code.
This makes it perfect for beginners, but also very interesting for creators, freelancers, and business owners who want a lightweight and future-friendly WordPress setup.
If you want to understand why this native approach is becoming more important, you may also enjoy my article about the Full Site Editing era.
Step 1: Choose Hosting and Install WordPress
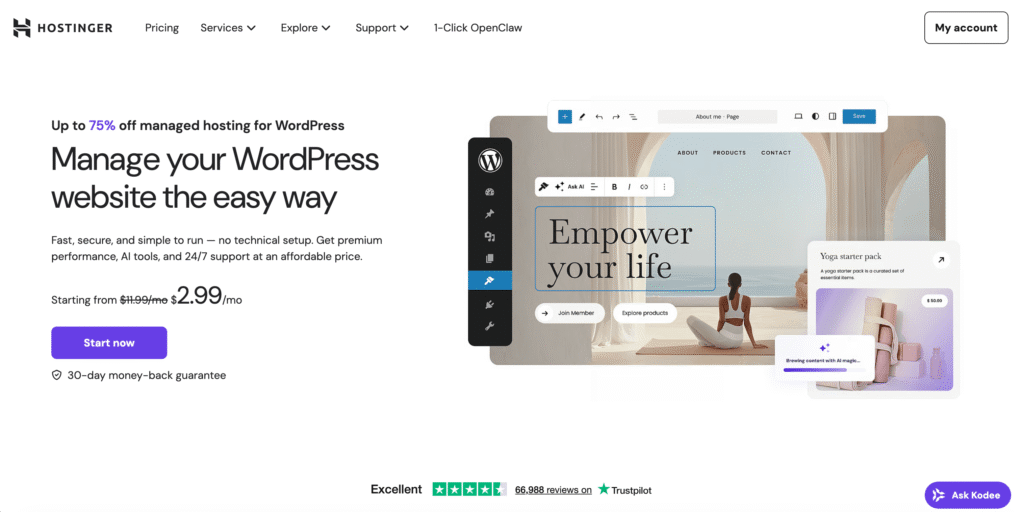
The first practical step is to choose a hosting provider. Hosting is the foundation of your blog because it stores your WordPress files, your database, your images, and all the content you’ll publish over time.
In the video, I use Hostinger because it makes the process beginner-friendly: you can buy your hosting plan, register or connect a domain, install WordPress, and access your dashboard without dealing with technical server configuration.
When choosing your hosting plan, look for a few important things:
A free domain for the first year can help you reduce the initial cost of starting your blog. Daily backups are important because they give you a safety net if something goes wrong. Good performance matters because your blog should load quickly for visitors. Email accounts can also be useful if you want a professional address connected to your domain.
If you want a deeper walkthrough of the platform itself, I also created a dedicated Hostinger tutorial where I explain how to use it for WordPress.
Once WordPress is installed, you can access your admin dashboard and start configuring your new blog.
Step 2: Configure the First WordPress Settings
Before designing the blog, it’s worth spending a few minutes on the basic WordPress settings.

Go to Settings, then General, and update your site title and tagline. Your site title is usually the name of your blog. Your tagline should be short and clear: a simple sentence that explains what your blog is about.
You can also upload a site icon. This is the small icon that appears in browser tabs, bookmarks, and other areas of the interface. It may feel like a small detail, but it makes your blog look more professional immediately.
Then check your language, time zone, date format, and time format. If you are publishing content regularly, having the correct time zone is important because WordPress uses it for scheduling and displaying publication dates.
At this point, it’s also a good idea to clean up the default content. You can remove the “Hello world” post, review or delete the automatically generated privacy policy page, and remove plugins or themes you don’t need.
For this tutorial, the blog is built with the default Twenty Twenty-Five theme, which is clean, native, and fully compatible with the WordPress Site Editor.
Step 3: Create Your Main Pages
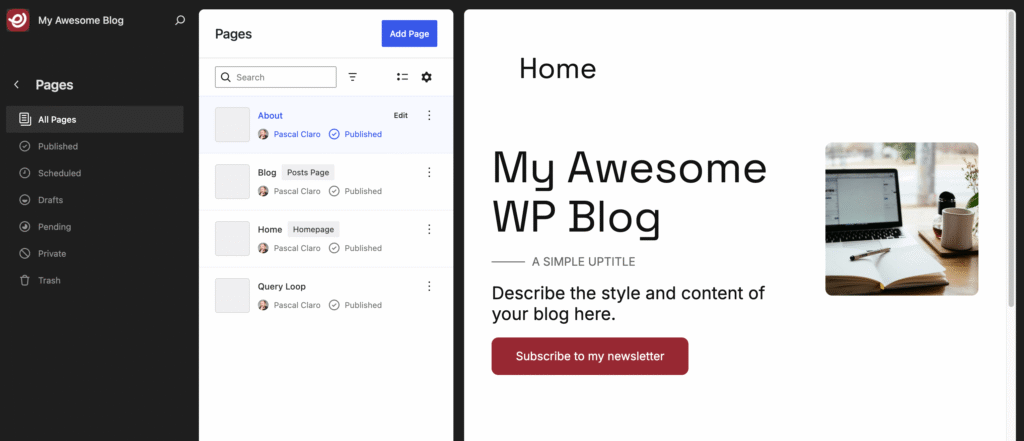
Now it’s time to create the essential pages for your blog.
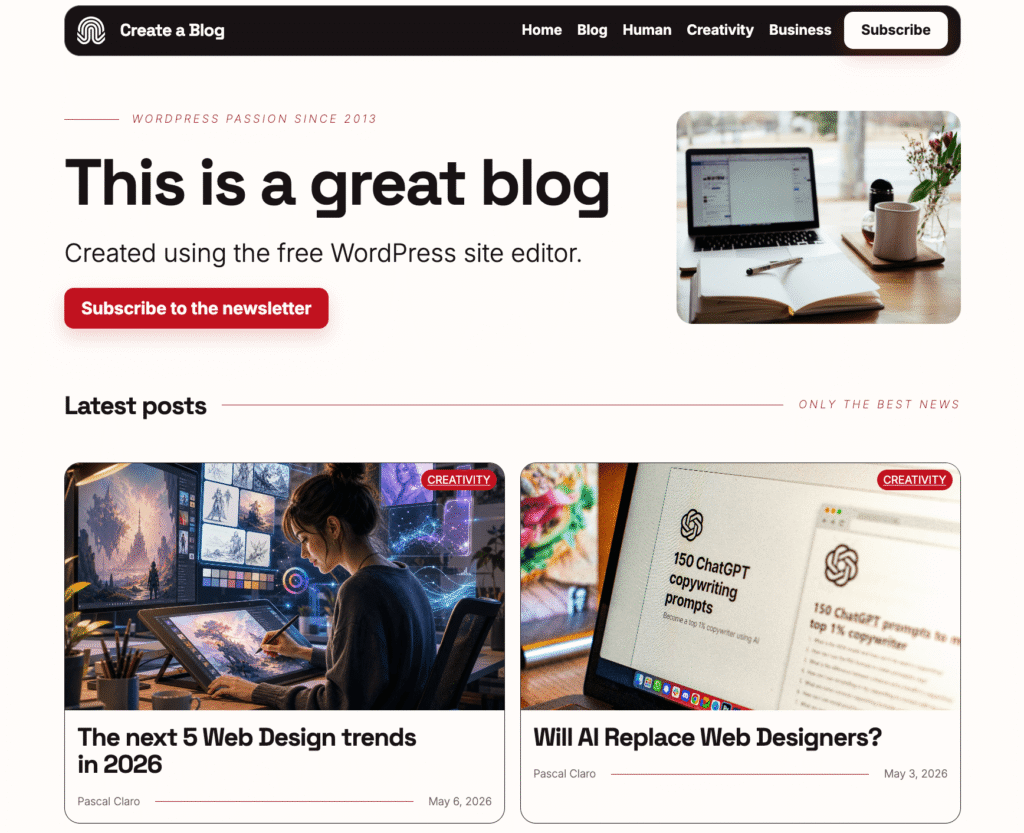
You’ll normally need at least a homepage and a blog page. The homepage is the front page of your website, while the blog page is where WordPress will automatically collect and display your published posts.
In WordPress, you can create these pages from the Pages section or directly through the newer Site Editor interface. Create a page called Home and another one called Blog. Then assign them correctly: set Home as your homepage and Blog as your posts page.
This step is important because it tells WordPress how to organize your site structure. Instead of showing your latest posts directly on the homepage by default, you’ll have a custom homepage and a dedicated blog archive.
That gives you much more control over the design and the user experience.
Step 4: Design the Header and Footer
The header is one of the most important parts of your blog because it appears on every page and helps people navigate your content.
Using the WordPress Site Editor, you can edit the header visually. Add your site logo, keep or customize the site title, and create a simple navigation menu with links to your homepage, blog page, and important categories.
You can also add a call-to-action button, for example a newsletter signup button. This is a smart idea because if your blog is part of a long-term content strategy, your email list can become one of your most valuable assets.
The footer works in a similar way. You can keep it simple with links to your homepage, blog, about page, contact page, and any legal pages you need. The goal is not to make the footer complicated. The goal is to make it useful, clean, and consistent with the rest of the website.
A nice touch shown in the video is creating a floating-style header and footer by adding background color, padding, spacing, and border radius. Small design decisions like this can make a very simple WordPress theme feel much more custom and polished.
Step 5: Customize Global Styles
One of the biggest advantages of the WordPress Site Editor is the Global Styles panel.
Instead of styling every block manually, you can define the overall design language of your blog in one central place. You can change your color palette, typography, button styles, layout width, spacing, and block-specific styles.
For example, you can install Google Fonts directly from the font management panel and apply a font like Space Grotesk to your headings and Inter to your body text. You can also customize the button block so every button on your website has the same border radius, background color, and general style.
This is where your blog starts to feel like a real brand instead of a default WordPress installation.
A good rule: keep your style decisions simple. Choose one font for headings, one font for body text, one main accent color, and one or two supporting colors. Consistency is more important than complexity.
You can find more WordPress design and building tutorials in the WordPress Tutorials section of WP Roads.
Step 6: Build the Homepage Hero Section
Once the global style is in place, you can start building your homepage.
The first section is usually the hero section. This is the top part of your homepage and should quickly explain what your blog is about.
A simple structure works very well:
Use a two-column layout. On the left, add a small intro line, a strong H1 title, a short description, and a call-to-action button. On the right, add an image that represents the style or topic of your blog.
With the Block Editor, you can add these elements using native blocks: Paragraph, Heading, Buttons, Columns, Separator, and Image.
You can also rename sections in the List View to keep your page organized. This is a small workflow habit, but it becomes very useful as your homepage grows.
For the image, don’t forget to add alt text. Alt text improves accessibility and can also help search engines understand your content better.
Step 7: Write Your First Blog Post in WordPress
Now let’s move to the part that matters most: publishing content.
To create your first blog post, go to Posts and click Add New. The WordPress Block Editor is designed for writing, so you can create your post using headings, paragraphs, lists, images, galleries, buttons, embeds, and more.
Start with a clear title. Then write your introduction and structure the content with headings. Use H2 sections for the main parts of the article and H3 headings for subsections.
Before publishing, open the post settings and add a featured image, excerpt, category, and tags.
The featured image is usually displayed on the blog archive, category pages, and sometimes at the top of the single post template. The excerpt is a short summary of the article and can be used in archive cards and SEO snippets. Categories help organize your content into larger topics. Tags can be used for more specific ideas.
If you are wondering how to post on WordPress, this is the core workflow: create a post, write the content, add a featured image, assign a category, write an excerpt, preview, and publish.
That’s it.
Step 8: Customize the Single Post Template
By default, your blog posts will use the template provided by the theme. But with the WordPress Site Editor, you can customize that template visually.
This is one of the most powerful parts of the tutorial.
When you edit the single post template, you’re not editing one specific article. You’re editing the layout that every blog post will use automatically.
You can create a more professional single post layout with a two-column hero area: title and metadata on the left, featured image on the right. You can show the category, author name, published date, excerpt, and then the main content.
You can also add a sidebar-style call to action next to the article content. For example, you could invite readers to join your newsletter, download a free resource, or visit your tools page.
If you want to add a soft CTA to your blog posts, the Free Resources Collection is a great page to link from inside your content.
The important thing to understand is this: once the template is ready, every new blog post will automatically inherit the same structure. You only need to focus on writing and publishing content.
Step 9: Create a Better Blog Archive
The blog archive is the page where your latest posts are displayed.
Instead of accepting the default layout, you can customize the blog archive template with the Site Editor. You can add a title, a short description, a separator, and then use the Query Loop block to display your posts as cards.
The Query Loop block is one of the most important native WordPress blocks for blog websites. It lets you display posts dynamically based on different settings. You can control the layout, number of posts, columns, featured images, titles, excerpts, dates, and more.
For a clean blog archive, a two-column card layout often works very well. It gives each article enough space to breathe while still showing multiple posts on the page.
You can also reuse this query layout on your homepage to show your latest posts below the hero section. This is a smart way to keep the homepage fresh automatically every time you publish a new article.
Step 10: Organize Your Blog With Categories
Categories are essential for a blog website.
If you write about different topics, categories help visitors discover related articles more easily. They also create dedicated archive pages for each topic.
For example, if your blog covers creativity, business, and technology, each category can have its own page collecting all the posts assigned to that topic.
In the Site Editor, you can customize the category archive template too. A good approach is to make it visually consistent with your blog archive. You can use a dynamic archive title, a term description, and a Query Loop that automatically displays the posts from the current category.
Then, from the WordPress admin, you can edit each category and add a description. This description can appear on the category page and help both users and search engines understand what the topic is about.
You can also add your most important categories to the main navigation, making your blog easier to explore.
Step 11: Use AI to Help Create Blog Posts
In the video, I also show how to use Kodee, the AI assistant provided by Hostinger, to help create the structure of a blog post.
This doesn’t mean you should publish AI content without reviewing it. The best workflow is to use AI as a starting point.
For example, you can ask Kodee to prepare a blog post draft with a title, a basic structure, short paragraphs, lists, and a friendly tone. Then you can edit the content, improve the examples, add your personal experience, refine the headings, and make sure the article is genuinely useful.
You can also ask the assistant to shorten an excerpt, suggest a featured image, assign a category, or help organize the content.
This can be especially useful for blogging for beginners, because the hardest part is often not clicking the publish button. The hardest part is starting with a clear structure.
AI can help you move faster, but your expertise and personal voice are what make the article valuable.
Step 12: Prepare Your Blog for SEO
Once your blog structure is ready, SEO becomes very important.
At the basic level, each article should have a clear keyword focus, a good title, a useful introduction, proper headings, internal links, optimized images, and a helpful excerpt or meta description.
A plugin like Rank Math can help you control SEO titles, meta descriptions, schema settings, indexing options, and more. I have a dedicated Rank Math SEO Plugin Tutorial if you want to go deeper into that part.
For a new blog, focus on publishing useful content consistently. Don’t try to over-optimize every sentence. Instead, answer real questions your audience is already asking.
For example, if your audience is searching for “how to create a WordPress blog,” “how to post a blog on WordPress,” or “how to write your first blog post on WordPress,” your article should clearly answer those questions with practical steps, screenshots, examples, and a logical structure.
Good SEO today is not just about keywords. It’s about usefulness, clarity, trust, and content that actually helps people move forward.
Final Thoughts
Creating a blog with WordPress is much easier when you understand the native workflow.
You don’t need to start with a complex page builder. You don’t need to install a premium theme immediately. You can create a professional blog website using the free WordPress Site Editor, the Block Editor, a clean default theme, and a few smart design decisions.
Start with the basics: choose good hosting, install WordPress, clean the default setup, create your homepage and blog page, customize the header and footer, define your global styles, and build a simple homepage.
Then create your first post, customize the single post template, improve the blog archive, organize your content with categories, and prepare your site for SEO.
From there, the most important thing is to publish.
Your first version doesn’t need to be perfect. It needs to exist. Once your blog is online, you can keep improving the design, refining your templates, adding better calls to action, and publishing more useful content for your audience.
That’s the beauty of WordPress: you can start simple, learn by doing, and grow your blog step by step.