Why Elementor Popups Are A powerful Marketing Tool
🚀 This tutorial is sponsored by Cookiebot By Usercentrics: the perfect solution to hep you make your WordPress website compliant with a professional Cookie Banner and Cookie Policy.
When people think about popups, they usually imagine something intrusive—a box that appears at the wrong moment and pushes them away from the website. But when popups are designed carefully and triggered at the perfect time, they become one of the most effective ways to grow your audience, promote your offers, and guide visitors toward the next step.
That’s exactly what the Elementor popup builder allows you to do.
In the video tutorial above, I walk through the entire process of creating a popup from scratch. We explore the design settings, the behavior settings, and the advanced options that make your popup feel intentional instead of annoying. This article expands on those steps, showing you not just how to build a popup with Elementor, but why certain choices matter—and how you can use popups to improve your overall WordPress marketing strategy.
Before diving in, 3 quick reminders:
- Your WordPress website must always be compliant. That’s why you shouldn’t use Elementor popups for cookie consent banners. As I explain in the video, a proper consent solution needs to block cookies until a visitor gives permission, categorize trackers, store consent, and stay updated with worldwide regulations. A simple popup cannot do this. If you need a compliant solution, tools like Cookiebot by Usercentrics handle all of this out of the box (full tutorial coming next week on WP Roads).
- The same goes for mobile menus: Elementor now provides an Off-canvas widget designed specifically for navigation (check my Elementor mobile menu off-canvas tutorial here). Use that instead of the popup builder.
- To use Elementor popup builder you need to have Elementor Pro Advanced Solo or higher licenses.
Now that the ground rules are clear, let’s get into the fun part: building your popup.
Building Your First Elementor Popup From Scratch
Creating a popup begins in a familiar place: Templates → Popups → Add New. Elementor will ask for a name; choose something descriptive like “Lead Magnet Popup” or “Promo Slide-In.” This helps keep your popup library organized as your site grows.
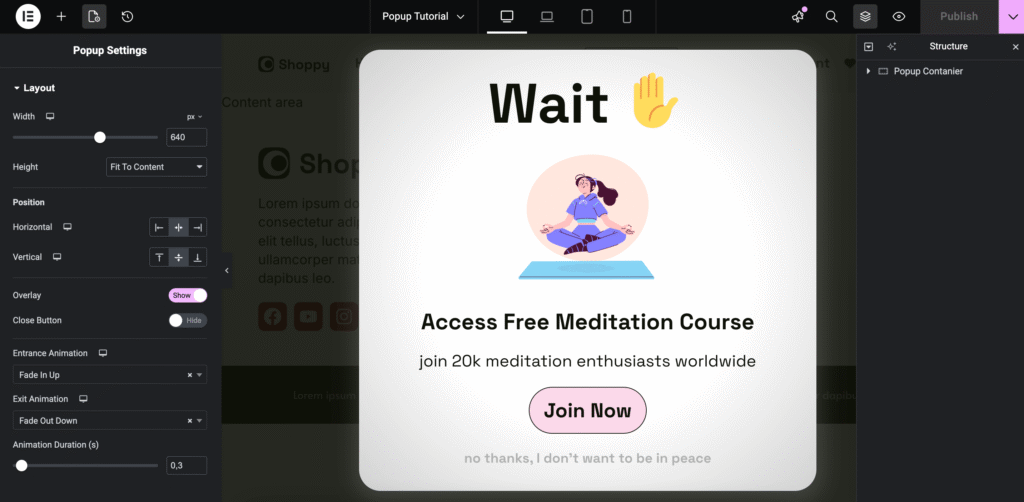
Elementor will then offer a gallery of ready-made popup templates. These can be helpful, but in the video tutorial we start from scratch to fully understand the major settings. Closing the template gallery brings you into a blank popup canvas—the perfect playground for your design.
👉 Info: if you don’t want to start from scratch you can use my 3 free popup templates, you’ll find them here.
On the top left, when you click on the “page settings icon” you’ll see three tabs unique to popups:
- Layout – width, height, placement, overlay, animations
- Style – background, borders, overlay design, close button design
- Advanced – behavior, accessibility, scrolling rules, and custom CSS
Understanding these settings is key to crafting a popup that looks polished and behaves exactly the way you want.
Crafting the Layout: The Foundation of Your Popup
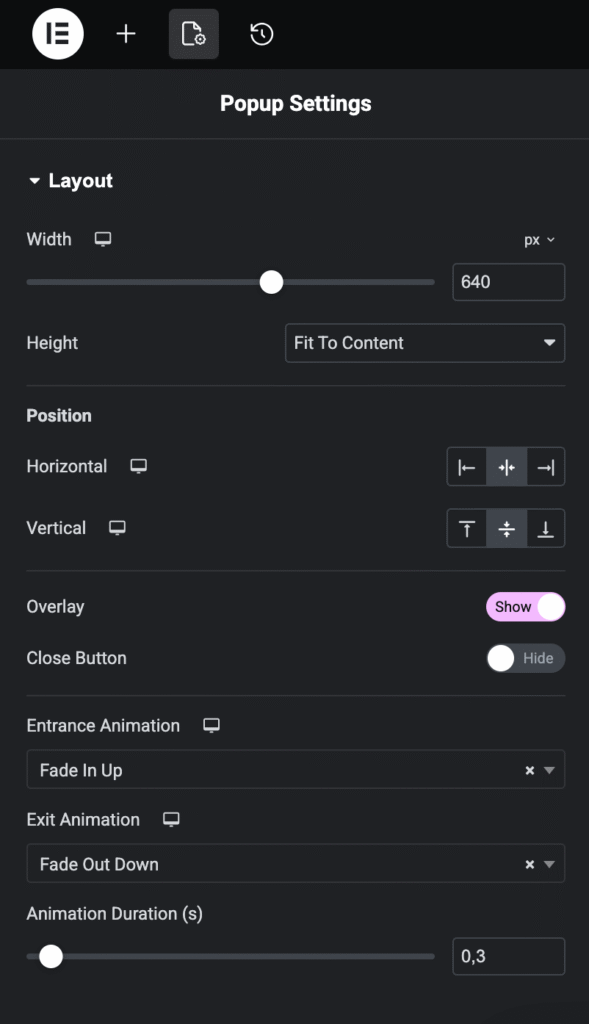
Width, Height, and Positioning
By default, your popup is 640px wide and centered on the screen. This is a great starting point for lead generation popups, announcements, and content promotions. You’re not limited to pixel values though—Elementor lets you use viewport width if you want a full-width bar or notification strip (just set 100vw as a value).
Height should usually stay on “Fit to Content”, letting the popup grow naturally based on what’s inside. But if you prefer a full-screen experience, you can switch to “Fit to Screen.”
Positioning is customizable: center, corner, top bar, bottom slide-in—anything you need. This flexibility is what makes Elementor popups fit multiple use cases, from subtle slide-ins to bold full-screen offers.
Overlay and Close Button
The overlay is the darkened area behind the popup. It helps the popup stand out and focuses the visitor’s attention. Most of the time, you’ll want it enabled. But for lightweight popups—like a small bottom bar or a slide-in—you should disable the overlay entirely to grand a smooth experience to your visitors.
As for the close button, you can show it, hide it, or replace it with your own custom close link (we’ll do that later in the article). Elementor lets you control placement, size, color, and hover effects, so you can adapt it to your brand.
Entrance and Exit Animations
Animations should feel smooth, not distracting. The tutorial uses Fade In Up and Fade Out Down at 0.3 seconds. These add a touch of polish without calling too much attention to themselves. Avoid flashy animations like bounce or rotate—they feel outdated and rarely convert better.
Shaping the Visual Design
This is where your popup starts becoming yours. Elementor gives you full control over the background, borders, shadows, and the styling of the overlay.
A Clean and Modern Background
In the video, I use a subtle radial gradient:
- White at the center
- A gentle grey around the edges
This gives the popup a soft spotlight effect—warm, inviting, and highly readable. It’s a simple trick that makes a big difference in perceived quality.
If you prefer, you can also add:
- A solid background
- A photo
- A pattern
- A decorative image in the overlay
It all depends on your brand and the type of popup you’re building.
Border Radius and Shadow
Rounded corners and light shadows give your popup a modern floating-card style. If your Elementor site uses a design system with global variables (highly recommended), apply your global border radius here so your popup fits seamlessly with the rest of your website.
Overlay Design
A dark overlay helps focus attention, but you can also use an on-brand color with reduced opacity. This keeps your site visible while clearly emphasizing the popup content.
Building the Content Inside Your Popup
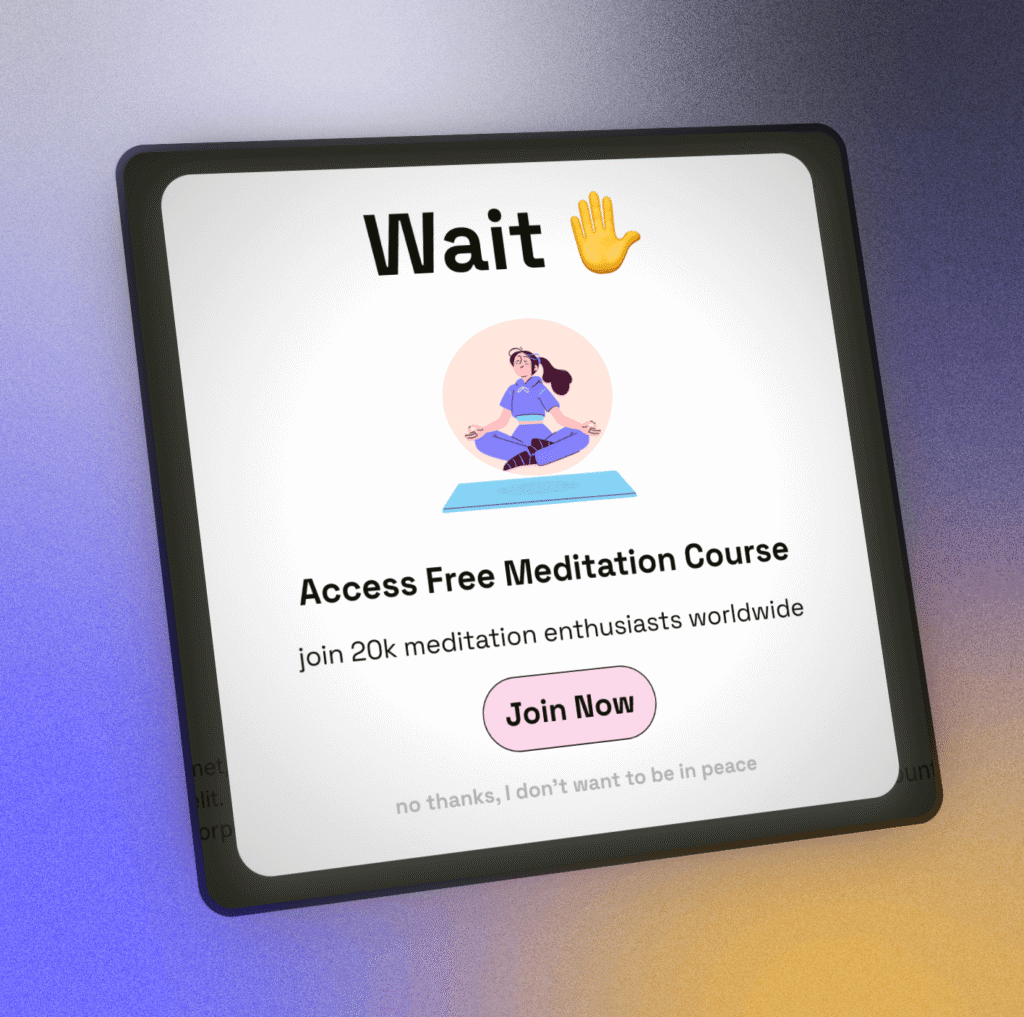
Once the structure looks right, it’s time to build your content. In the video, the popup promotes a free meditation mini-course, but you can adapt the steps to match any offer.
Start With a Flexbox Container
Insert a new Flexbox container and set:
- Direction: Column
- Horizontal alignment: Center
- Vertical alignment: Start or Center, depending on your design
Flexbox containers give you stricter control over spacing and alignment compared to classic sections.
Add Your Heading
Drag in a Heading widget. Keep the heading as H2, since your article or page already has an H1. Use your global typography to stay consistent with your site.
Add a Lottie Animation
Animations help draw attention, especially in a popup. Elementor supports Lottie files, which are lightweight, scalable, and loopable.
In the tutorial, I include 10+ free Lottie animations you can download here.
Choose one that fits your popup’s message, enable Loop, and size it around 200px for a clean look.
Add Supporting Text
Below the animation, add a subheading or an explanatory paragraph. Keep it short and actionable—popups are not the place for long-form writing.
Add Your Call-to-Action Button
Drag a Button widget and apply your global button style:
- Strong contrasting background
- Clear label
- Smooth hover effect
- Direct link to your landing page, product, or opt-in form
This is the primary action of your popup, so keep the copy benefit-driven.
Add Spacing
Select the container and add generous vertical padding (e.g., 2rem top and bottom). This keeps your design breathable and modern.
Publishing and Testing Your Popup
When you click Publish, Elementor immediately asks you to define:
- Where the popup appears (Display Conditions)
- When it appears (Triggers)
- How often it appears (Advanced Rules)
Let’s walk through these settings.
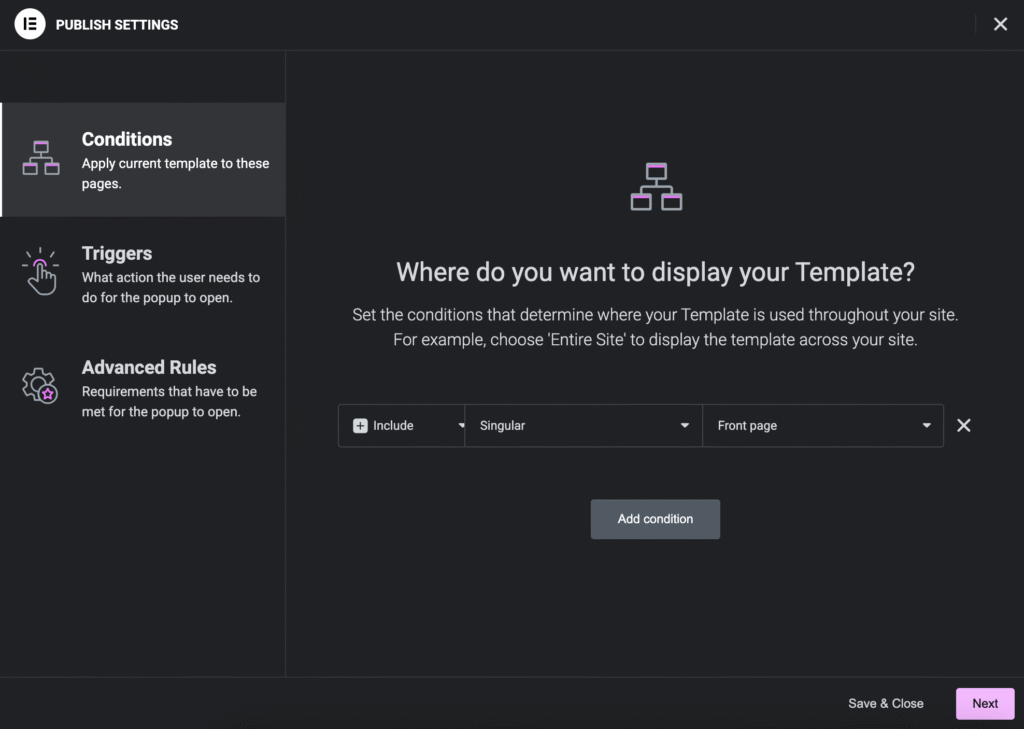
Display Conditions: Choosing Where the Popup Appears
Elementor’s display conditions let you show your popup on:
- The entire website
- Specific pages or posts
- Archives (categories, blog index, search results)
- WooCommerce pages (product pages, categories, tags)
For example, if your popup promotes a downloadable PDF about SEO, you might show it only on:
- Blog posts tagged “SEO”
- Your resources page
- Your newsletter landing page
While testing, it’s safest to show your popup only on a dedicated page—such as your Front Page—so visitors don’t see it before you’re ready.
Triggers: Choosing When the Popup Appears
Triggers determine the moment your popup becomes visible. Elementor includes several:
On Page Load
A classic trigger where the popup appears after X seconds. For testing, set this to 0 seconds.
On Scroll
Triggered when the visitor reaches a specific percentage of the page. Great for long articles and sales pages.
On Scroll to Element
One of the smartest triggers available.
You assign a CSS class to a section—like .wpr-popup-1—and Elementor shows the popup when visitors scroll to that section. Perfect for:
- Pricing tables
- Feature lists
- Comment sections
- Product galleries
On Click (global)
Triggered when the visitor clicks anywhere on the page. More niche, but useful for creative campaigns.
After Inactivity
Ideal for long pages where visitors might need a reminder or offer.
Exit Intent
One of the most powerful triggers.
When the user moves their cursor toward closing the tab, the popup appears. This is perfect for:
- Last-chance discounts
- Newsletter subscriptions
- Lead magnets
- Free shipping offers
Triggering a Popup With a Button or Image
Instead of using global triggers, you can open a popup by clicking:
- A button
- An image
- A container
- A card or section
To do this, select the element → Link → Dynamic Tags → Actions → Popup → Open Popup.
This creates highly interactive experiences inside your page designs.
Advanced Rules: Controlling Frequency and Visibility
Advanced rules prevent popups from becoming annoying or repetitive.
Show After X Page Views
Great for showing popups only to engaged visitors.
Show After X Sessions
A session ends when a visitor leaves your site.
You can show the popup after, say, 3 sessions—perfect for returning visitors.
Show Up to X Times
Let Elementor remember whether a visitor has closed or opened your popup:
- Once per session
- Once per day, week, or month
- Or persistently (stored in a cookie)
This keeps your user experience respectful.
Show When Arriving From a Specific URL
Useful for:
- Specific campaigns
- Traffic from your homepage
- Visitors from external domains
Elementor even lets you use regex patterns for advanced matching.
Hide for Logged-In Users
Prevent popups from appearing for admins, editors, or your members.
Device, Browser, and Scheduling
Fine-tune visibility by device type, browser, or specific dates—for example, a Black Friday offer that runs only for three days.
Free Popup Templates and Lottie Animations
All the popup designs and Lottie animations from the video are available here for free.
You’ll find:
- The main lead-capture popup
- A top/bottom opt-in bar
- A slide-in popup
- 10 Lottie animations to use in your Elementor popups
Download the JSON files and import them into Elementor.

Final Thoughts
Elementor popups have become an essential part of modern WordPress marketing. They’re flexible enough for announcements, powerful enough for advanced targeting, and customizable enough to match any brand or design system.
Once you understand how layout, styling, triggers, and advanced rules work together, you can build experiences that feel smooth, helpful, and perfectly timed—not distracting or annoying.
If you’re building your site from scratch or want to create a cleaner design foundation before adding popups, I recommend starting here.
With a strong base, your popups—and your entire website—work together as one consistent, high-converting system.