Elementor Contact Form Tutorial: Create a Multi-Step Form with File Upload, Anti-Spam, and More
Creating a professional contact form in WordPress has never been easier—or more powerful—than with Elementor Pro. In this step-by-step Elementor contact form tutorial, I’ll show you how to build an advanced multi-step form that includes:
✅ Multiple input fields
✅ File upload
✅ Choice inputs (checkbox, radio, select)
✅ Spam protection with Honeypot & Google reCAPTCHA V3
✅ Submission collection
✅ Email notifications
✅ Custom confirmation page
✅ Marketing integrations with tools like MailerLite
By the end of this guide, you’ll have a high-performing, beautifully styled form using the Elementor form builder, ready for any business or creative project.

👋 Welcome, WP Roadies!
Hi there, Pascal here from WP Roads! If you're building a WordPress site with Elementor and want to create a clean, modern, and conversion-ready contact form, you’re in the right place.
We’re using the Elementor form builder and Elementor Pro to set up everything from input fields to email automation. This tutorial works great whether you're optimizing your Elementor contact form design or starting from scratch.
🎯 Pro tip: You’ll need an Elementor Pro Advanced Solo (or higher) license to unlock features like Form Submissions and marketing integrations. Grab yours here 👉 wproads.com/elepro
🚀 Step 1: Add Your Elementor Contact Form to a Page
Start by dragging the Form widget into your layout. This begins your Elementor contact form setup.
Rename the form for internal clarity and prep your page using the Elementor Canvas template if you want to create a distraction free experience. Clean layout = better focus.
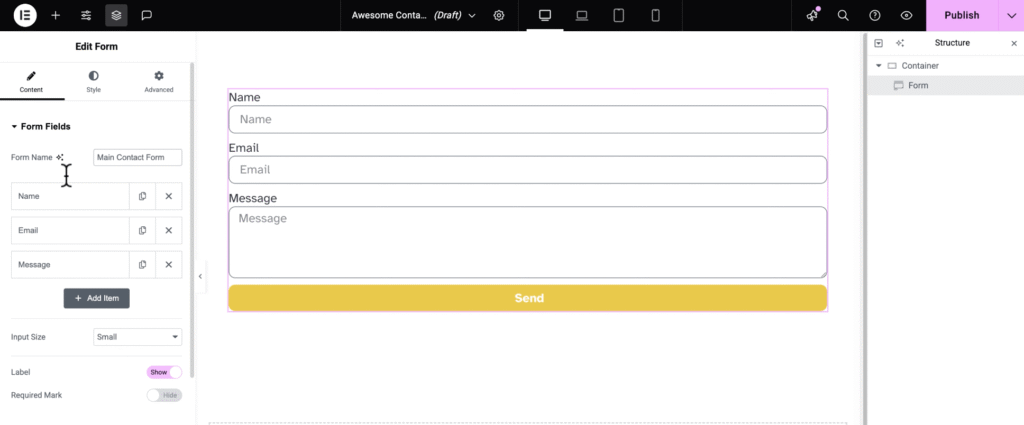
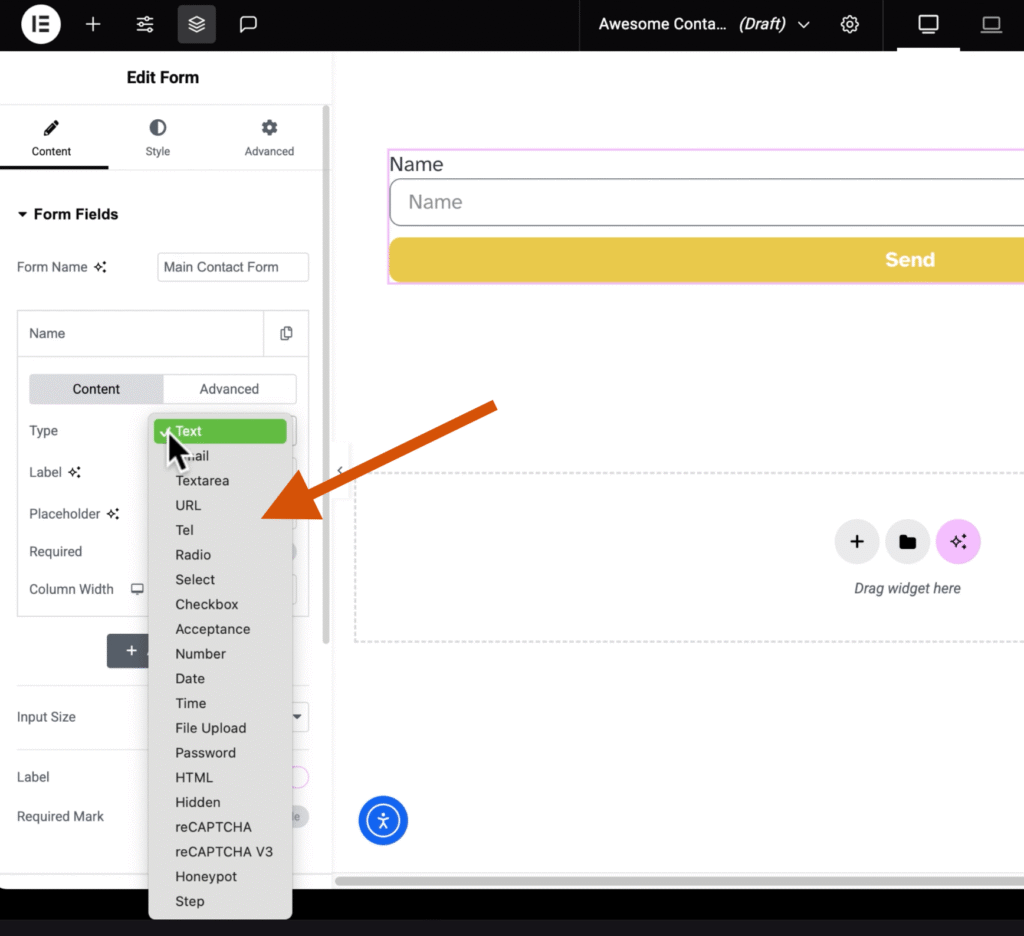
✍️ Step 2: Add Smart Input Fields
We’ll use the Elementor form builder to add key fields like:
- Text fields for first and last name
- Email and telephone inputs
- Textarea for messages
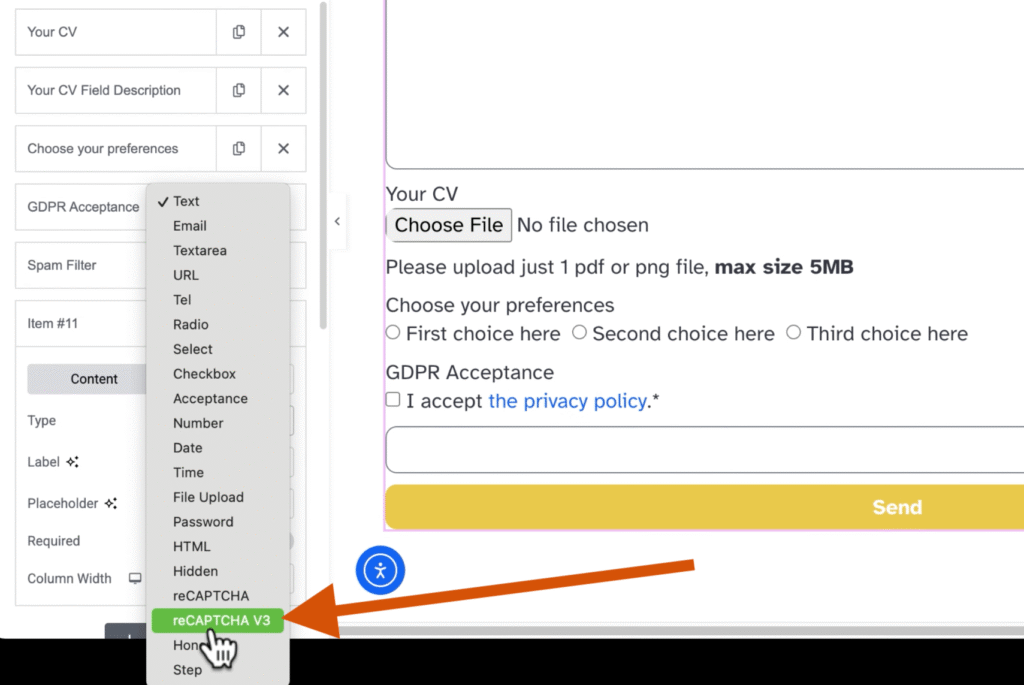
- File upload (for CVs, portfolios, or any attachments)
- Radio buttons, checkboxes, and dropdowns
- Acceptance checkbox for privacy/GDPR
- Hidden fields for dynamic data
If you're learning how to build your first form, this is the best Elementor form builder tutorial to follow.
🔐 Step 3: Protect Your Elementor Contact Form from Spam
To keep your form safe and clean, we activate:
- Honeypot – traps bots silently
- Google reCAPTCHA V3 – provides stronger invisible spam filtering
This double-layered protection ensures your contact form Elementor Pro setup doesn’t become a spam magnet.
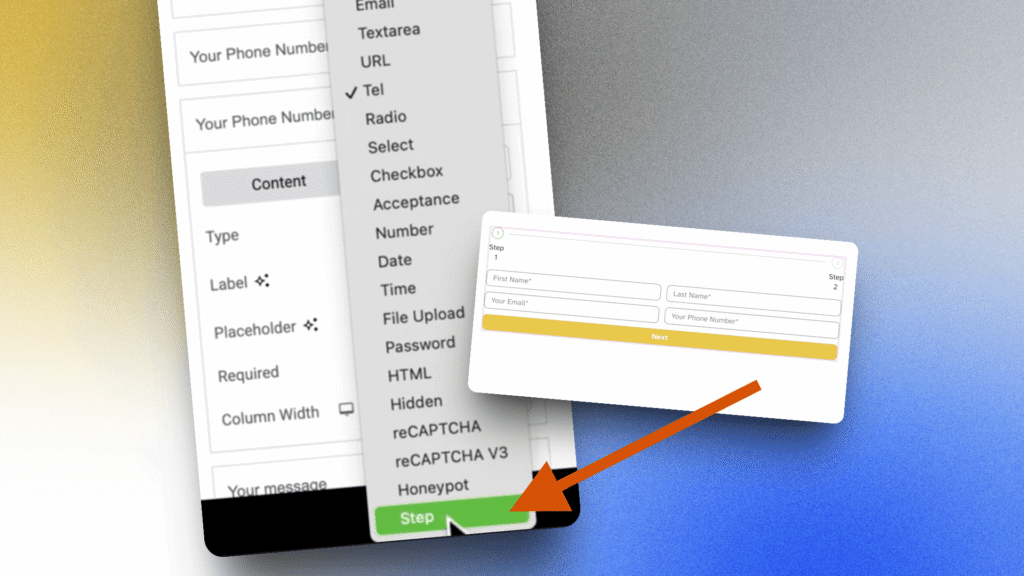
🧩 Step 4: Create a Multi-Step Form
Multi-step forms are not only trendy—they increase conversions.
With Elementor contact form design features, we break long forms into logical steps. You'll learn how to:
- Insert step dividers
- Customize next/previous buttons
- Add icons or progress indicators
- Design a clean step-by-step experience
This is where your form starts to look truly professional.
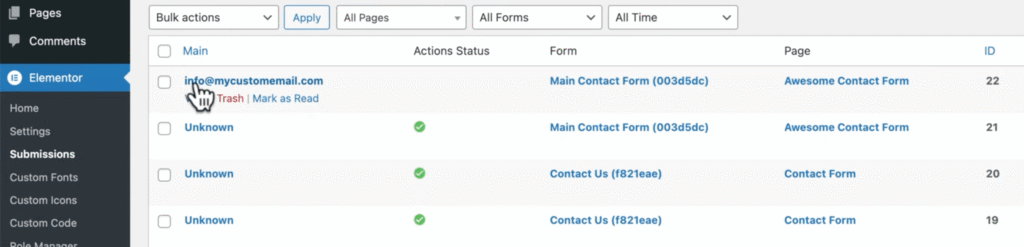
✉️ Step 5: Configure Submissions & Notifications
Next, we fine-tune the Elementor contact form setup with:
- Collect Submissions for viewing entries in the WordPress backend
- Email notifications to your admin email
- Custom confirmation page for a polished user flow
- Optional: auto-response emails to users who submit the form (using the Email 2 action)
This transforms your static form into a smart system that communicates.
🔌 Step 6: Integrate Email Marketing (MailerLite Example)
Let’s link your form to MailerLite or your favorite platform. In this part of the Elementor form builder tutorial, you’ll:
- Add your MailerLite API key
- Choose a target group (audience list)
- Map email, name, and other fields
- Decide whether to allow resubscribe
Every form submission can now grow your mailing list—automatically.
🎨 Bonus: Style Your Elementor Contact Form
A beautiful form converts better. With Elementor contact form design options, you can:
- Adjust spacing, padding, and column widths
- Hide or show field labels
- Use HTML fields for in-line descriptions
- Customize typography, colors, and button styles
Turn your form from functional to fantastic!
🛠️ Featured Tools I Use (And Love)
- 🔧 Elementor Pro – For full control and dynamic features
- ☁️ Kinsta Hosting – Reliable, fast, and secure (sponsor of this content)
- 📩 MailerLite – Easy and powerful email marketing
- 📘 My Full Elementor Pro Tutorial – Build your site from scratch
Explore all my favorite WordPress tools 👉 wproads.com/tools
📺 Watch my Full Elementor Pro Tutorial
Follow my free Elementor Pro course!
From blank canvas to an advanced website, every detail of the Elementor Pro is covered!
💬 Let’s Hit 100 Likes and 100 Comments!
If this guide helped you, you can do me a quick favor ❤️ 👇
👍 Like the video
💬 Comment below this post and tell me where you’re watching from (e.g. “Thanks from Canada!”)
🔗 Share this tutorial with your WordPress group or community!
This helps me—and others—continue to grow and learn together.
✅ Final Thoughts
With this guide, you’ve now mastered the most powerful features of the Elementor form builder and how to use them to create a real-world, high-performing contact form in Elementor Pro.
From setup to spam control, from file uploads to MailerLite sync—your form is ready for 2025.
Now go build it. Test it. Launch it.
And remember: your form isn’t just collecting info—it’s starting conversations.