
Just Claude, WooCommerce & Novamira.
Building an e-commerce website with AI should involve more than generating an attractive homepage. A real store needs a consistent design system, a structured product catalog, responsive navigation, working shop templates, cart and checkout pages, and a reliable launch checklist.
In the video above, I show the complete workflow I used to build a polished WooCommerce store with Claude, WordPress and Novamira. Everything remains inside WordPress and can still be edited manually with the native Site Editor.

The tools used in this workflow
- Claude handles the planning, design system and guided building process.
- WooCommerce provides the products, catalog, cart, checkout and store data.
- Novamira Pro connects Claude to WordPress and gives the agent specialized WooCommerce capabilities.
- The WordPress Site Editor keeps the finished design editable without requiring a traditional page builder.
- Omnisend adds the lead-capture form, coupon and automated welcome email sequence.
- A staging or temporary website provides a safer place to build and review the store before connecting the final domain, I recommend Hostinger.

Before you begin: prepare the project
Create a dedicated folder containing your store brief, product information, images and visual references. A small HTML concept is particularly useful because Claude can inspect its structure directly, but a clear screenshot or mockup can also establish the art direction.
Build on a staging environment or temporary domain whenever possible. Install WordPress, WooCommerce and Novamira, connect the website to Claude, and confirm that the agent can access it before beginning the main workflow.
The free AI Store Kit used in the tutorial provides the structure, prompts and demo assets for this process.
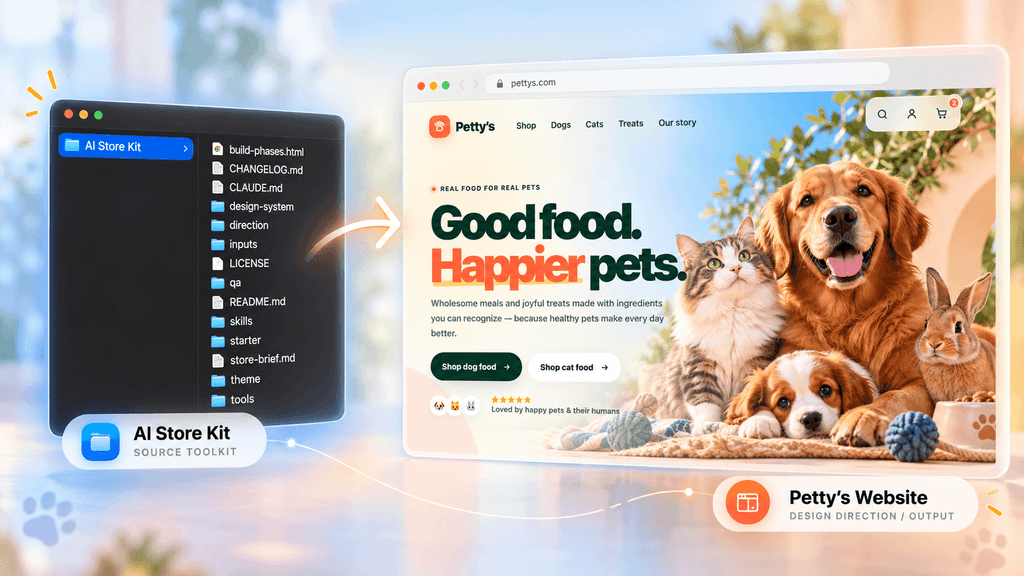
The seven-phase AI store-building workflow
The most important part of this method is dividing the project into controlled phases. Claude completes one phase, reports what it changed and waits for approval before continuing. This makes the process easier to review and reduces the risk of inconsistent design or unnecessary rebuilding.
1. Create the design system
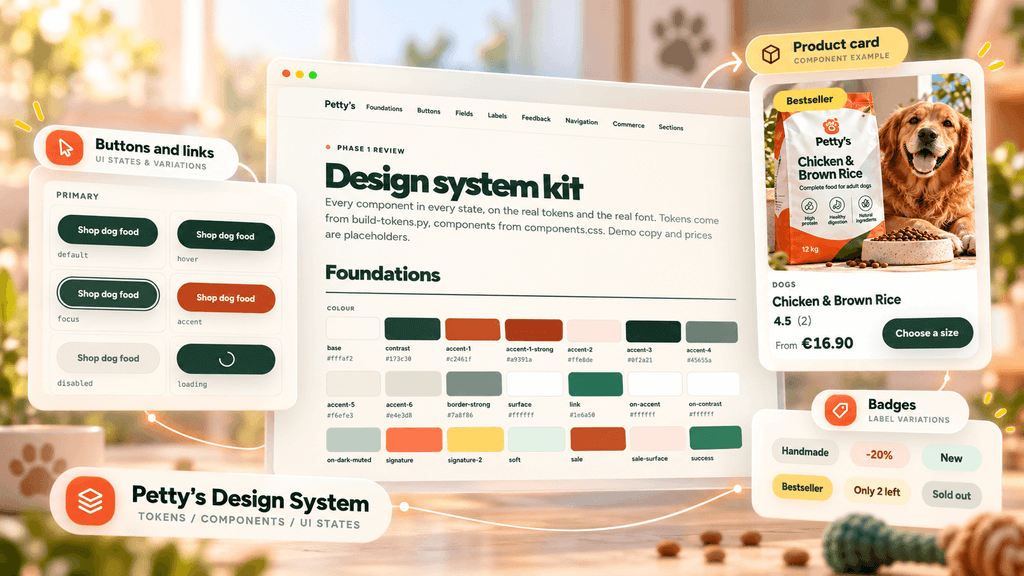
Claude converts the initial direction into a reusable system of colors, typography, spacing, buttons, product cards, review components and other interface elements. Review the visual preview carefully before approving it because every later phase will depend on these decisions.
2. Build the WordPress foundation
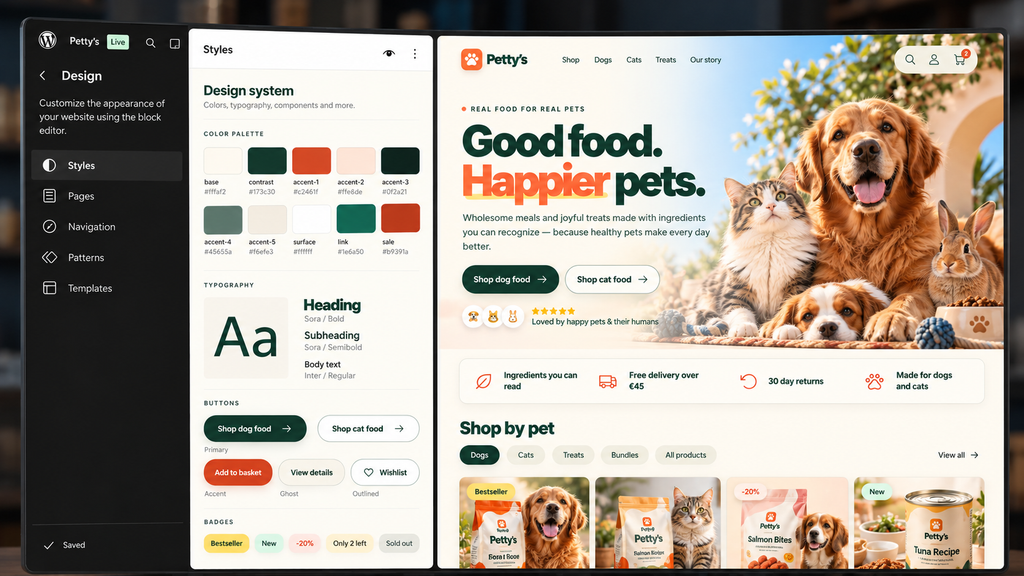
Claude installs and configures WooCommerce, prepares the block theme and applies the approved styles inside WordPress and Novamira. At this stage, verify that the global colors, fonts, links, buttons and spacing are available inside the Site Editor.
3. Import the store data
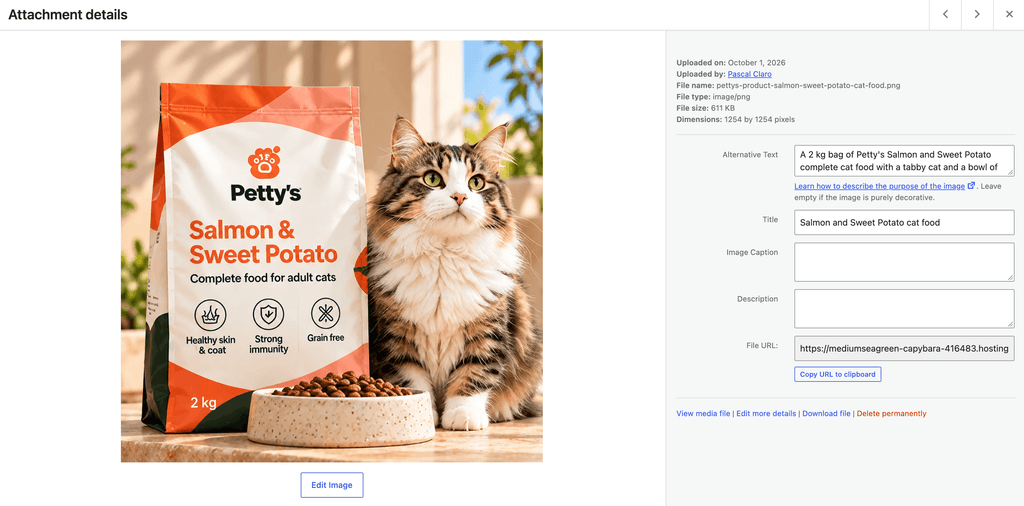
The agent uploads the media, creates products, categories, attributes, demo reviews, pages and menus, and prepares the basic store structure. Product images should have descriptive filenames and alternative text rather than generic generated names.
If you already have a real catalog, use accurate product data instead of letting AI invent final prices, claims or specifications.
4. Create the navigation and global templates
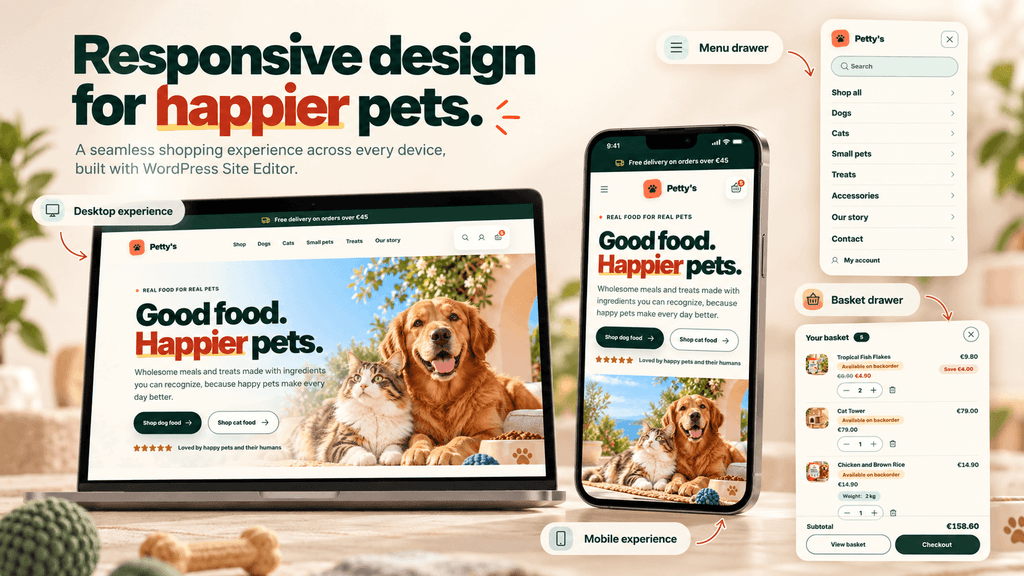
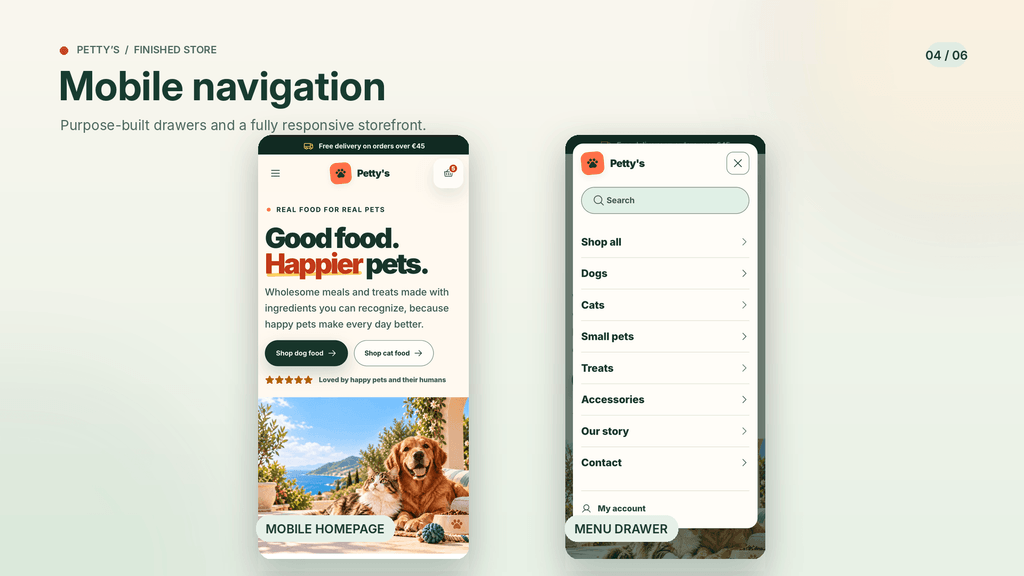
Claude builds the header, footer, desktop navigation, mobile menu, search experience and mini-cart. Test these elements on desktop and mobile before continuing because they will appear across the entire store.
All these elements remain editable in the WordPress Site Editor, so small manual changes do not require another AI request.
5. Build the complete shopping experience
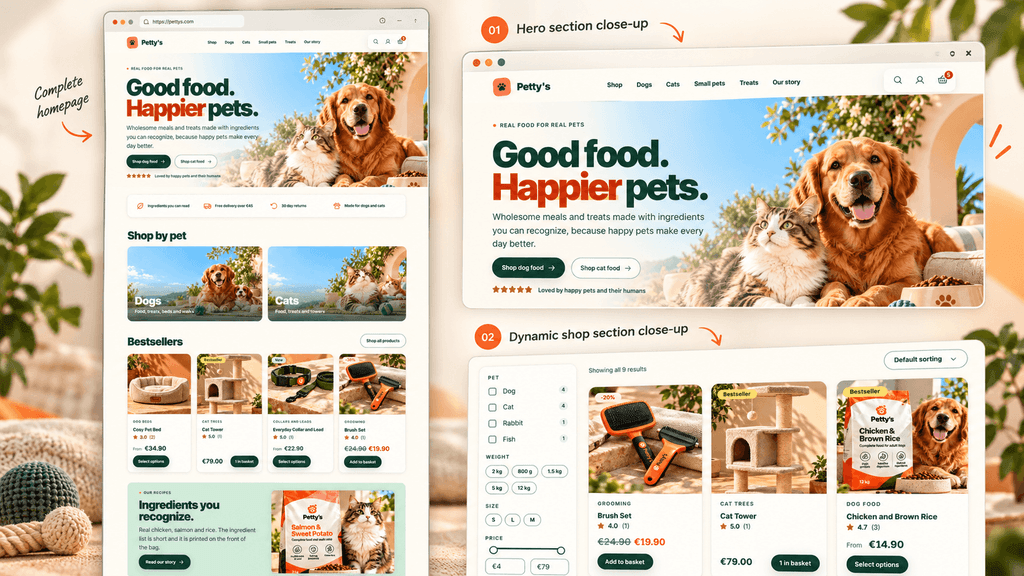
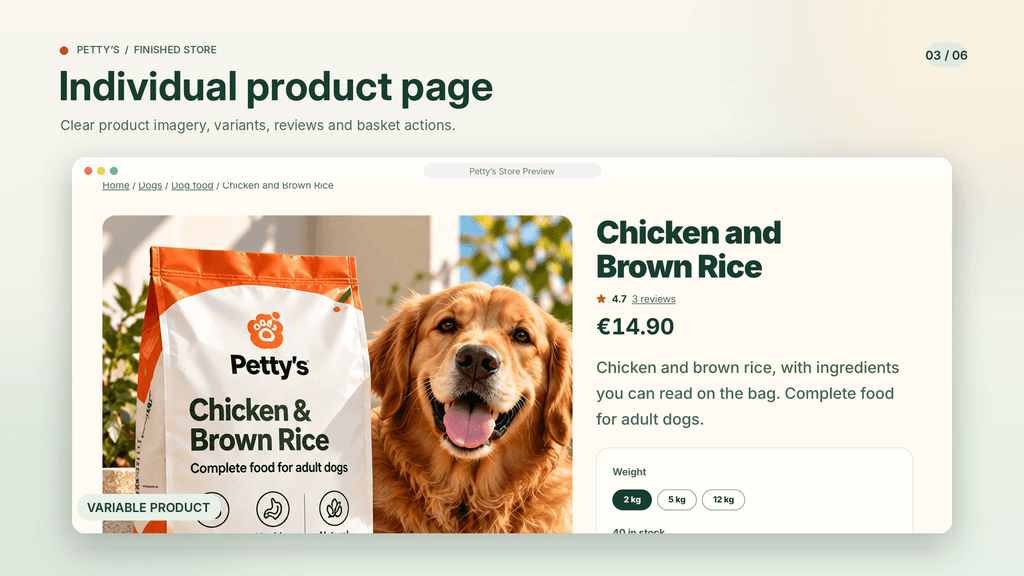
This phase creates and styles the shop archive, category pages, product pages, filters, reviews, cart, checkout, order confirmation and account area. Test the complete customer journey instead of reviewing each page only as an isolated design.
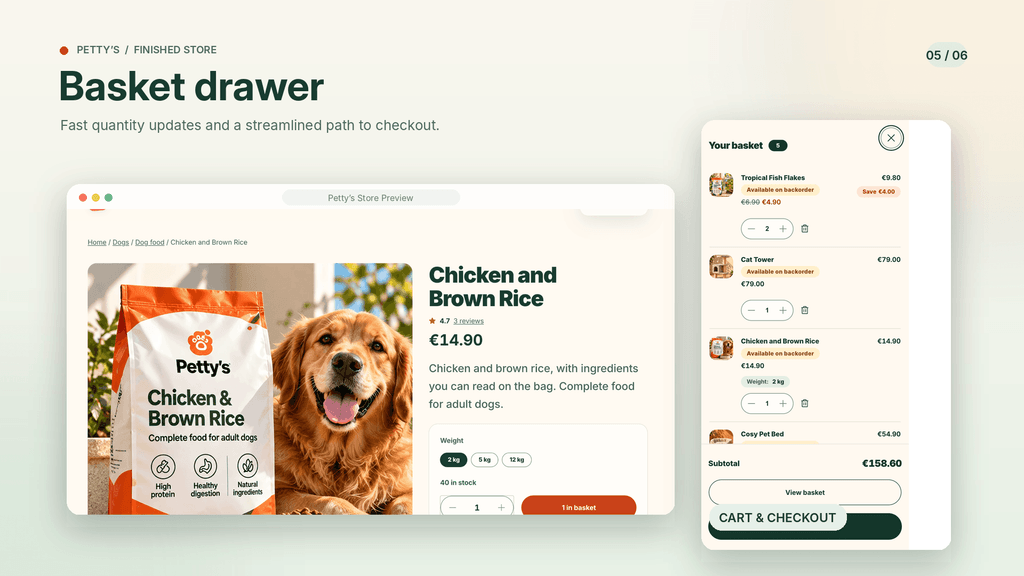
Add a product to the cart, change its quantity, open the mini-cart, proceed through checkout and verify the mobile experience.
6. Build the homepage
Once the store components are working, Claude assembles the homepage using the established design system and real WooCommerce data. This order is important: the homepage becomes the polished presentation layer for a store whose underlying shopping experience already exists.
Review every call to action and confirm that category links, product blocks, reviews and promotional sections use live store data correctly.
7. Run final quality checks
The last phase checks the main pages, responsive behavior, visual consistency and remaining launch requirements. Claude can prepare the checklist, but a human should make the final decisions.
Before launching, confirm:
- Payment methods and test transactions
- Shipping zones, costs and tax settings
- Product prices, stock and variations
- Legal, privacy, returns and contact pages
- Coupon rules and promotional claims
- Mobile navigation, cart and checkout
- Backups, security and update procedures
- Analytics, consent and transactional emails
Add an email automation that can generate sales
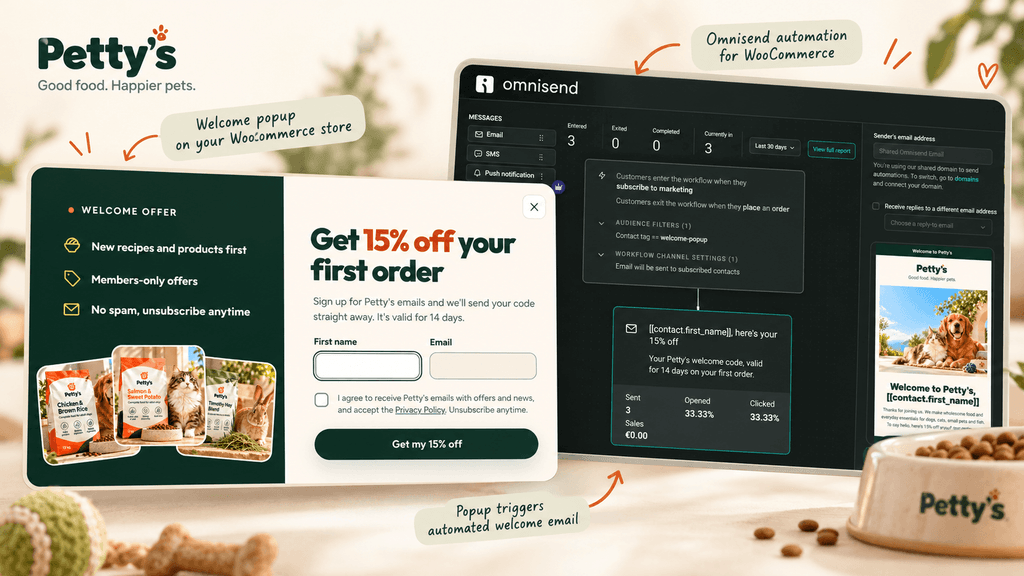
A finished store still needs a way to capture visitors and bring them back. In the tutorial, Claude connects the WooCommerce store to Omnisend and creates a branded subscription popup, a unique coupon and a three-email welcome sequence.
The automation respects the store's visual identity and stops sending promotional reminders after the subscriber purchases. Always review the email copy, timing, coupon conditions and exit rules before activating the workflow.
Practical tips that will save time and tokens
- Keep Claude's internal browser open and logged into WordPress. The agent needs that session to inspect and update the website.
- Do not interact with the browser tab Claude is using. Review the website in a separate browser instead.
- Use a capable model. For the workflow demonstrated in the video, Opus 5.5 produces the most reliable results.
- Approve one phase at a time. Read each report and correct the direction before later phases build upon it.
- Compact long sessions carefully. Ask Claude to preserve the project decisions, design rules, current phase and remaining tasks before compacting.
- Use real structured inputs. Accurate product data and organized images produce better results than vague prompts.
- Make a backup before major changes. AI assistance does not replace staging, versioning or a recovery plan.
- Treat AI output as a starting point. Manually test accessibility, performance, security and every revenue-critical workflow.
Final result
This workflow combines the speed of AI with the flexibility of WooCommerce and the native WordPress editing experience. The strongest result does not come from asking Claude to “build a store” in one prompt. It comes from providing a clear direction, dividing the work into phases and validating every important decision.



Watch the complete tutorial: https://youtu.be/01DmLTaUoPk
Download the free AI Store Kit
Disclosure: The video includes a paid partnership with Omnisend. Some links may be affiliate links, which help support WP Roads at no additional cost to you.